Showing posts with label handicrafts. Show all posts

Thursday, January 10, 2013

A Handmade Christmas: Gifts For Guys

Guys are so hard to shop for!!! Unless you have a) tons of money, or b) a guy who has an obsession - a favorite sports team, video game, movie, etc. If you have one or the other (or both!) of these things, then you're set. Even then, though, there are only so many sports jerseys, memorabilia, etc, that you can give a guy. And guys are hard to make gifts for, because whatever you're making can't. look. cute.

I feel like I have it especially tough because neither my dad nor my bro are into sports - as in, I don't think either of them could name three professional teams in any sport - nor are they gamers. Generally - as in, all the time except Christmas - I like these traits. :) When Christmas rolls around, I wish they were a little more stereotypical.

This year, with my goal of making every gift, I must have googled "handmade gifts for men" a dozen times, and read through literally hundreds of ideas. Here are the best of them!

First, a few I came up with:

Homemade car "emergency" kit - My brother is sixteen this Christmas and just a few weeks away from getting his license, so for Christmas I made him a "car kit." While I did buy the contents of the kit, I did assemble it myself (lol) and I sewed the actual case (although I didn't use a tutorial, this one right here looks exactly like mine - shh, don't tell the guy in your life that it's a makeup case! :) I made my version out of vinyl and a heavy-duty zipper, so it's water resistant and hefty).

 
With the exception of jumper cables, which I got on a fantastic sale on Black Friday, I got all of the following items at the Dollar store: a roll of duct tape (in his favorite color), a clip-on booklight (I figure it's useful if he has to make repairs by himself in the dark), a regular flashlight, an ice scraper, a tube of super-glue, a box of bandaids, an interchangeable-head screwdriver, a tire gauge, a roll of shop rags, and a can of auto wipes.

I'm not much of a mechanic (can you tell? lol) so I focused more on filling the kit with things that were "generally useful" (i.e. duct tape, super glue, flashlight) than tools. If you're a little more mechanically minded, you can google "emergency car kit" and get more ideas!

Barbecue kit - Some of my favorite memories from this year are of grilling with my BFF's fiancee, Joe, so when I started thinking about what I could make for him, some sort of grilling/barbecue related gift came to mind. This is sort of like the above gift, in that it is mostly buying things and "assembling" them (lol), but it still counts in my book. :)

My barbecue kit included: 2 hot mitts that I monogrammed for him using fabric paint, 2 towels, also monogrammed, and a jar of bacon salt (if bacon isn't his thing, swap it out for a jar of smoky BBQ rub). If I knew how to can, or if Joe lived locally, I'd totally throw in a jar of the best barbecue sauce ever. But since I don't, and he doesn't, and the jar would have to survive a 12 hour road trip unscathed, I can't. :(

Other ideas (that I had, but that didn't work for the guys in my life):
  • An iPod or iPad case - if your guy is tech savvy. The great thing about this is that by varying the material and/or embellishment, you can make them as masculine or feminine as you want.
  • Make a "movie buff" kit - mix up some homemade popcorn seasonings in salt/pepper shakers (check thrift stores and/or Ross or Marshalls), a box of plain microwaveable popcorn (or loose popping corn, dependings on how you like to make your popcorn), or make a batch of kettle corn. Put it together with a couple of new movies (raid the $5 at Wal-Mart), tickets to the movie theater, or a gift certificate to his favorite movie rental place (did you know that you can give gift certificates to Redbox? I didn't either!).
  • If your guy is a reader - well, you've scored a good one! :) Make a book kit instead! Include a manly bookmark (Check the thrift store for old copies of titles like "The Last Of The Mohicans," "Ivanhoe," etc, and replace the raffia/ribbon with leather thong). Add the fixings for his favorite hot beverage, and why not make some coasters (using the covers of the book you cannibalized for the bookmark, lol) while you're at it? Last (but not least), slip in the book you know he's been dying to read, or a gift certificate to the local bookstore. Or the Kindle store. :)
  • Fill his fridge - What guy doesn't love food? If you have a bachelor on your list, why not make a huge batch of lasagna, mac-n-cheese, or whatever your signature dish is, portion it into individual-size containers, and freeze? Print some labels that include reheating instructions, and you're set to go! (If you really want to go all-out, include a homemade "gift certificate" that entitles him to one free refill). Or try making a sweet edible bouquet. :)

Other people's ideas:

These are all the ideas I could come up with! :) What have you made for the guys in your life?

Thursday, January 3, 2013

A Handmade Christmas (Part 1)

This year I decided to attempt to make all the gifts I gave. While I was mostly successful (I ended up buying three people's gifts, lol), and learned a lot, I think I mostly learned how I could have done it better. :) I'm going to be doing a post each week on how to have a handmade Christmas, including some of the best tutorials I found (or created myself!), but I thought I'd start this off with a quick recap of the biggest lessons I've learned!
  • Start planning now. Start a folder on your computer, create a Pinterest board, or start clipping inspirations - trust me, you'll want all your ideas in one place, and nothing is more frustrating that knowing you saw a tutorial for the perfect gift but being unable to find it, or having to waste a lot of time tracking it down. Also, having a list of gift ideas reduces the panic of choosing a gift for a recipient - you already have a whole list of ideas!
  • Start creating early. My original plan was that I was going to try to make a few gifts a month, thus relieving the stress of trying to finish gifts last minute. This didn't happen, but I sooo wish it had. :( Trust me, you'll enjoy the creative process much more if you're not rushing to finish things last-minute! (And just a note: plan on spending more time that you think it will take, especially if you're learning a new skill or trying a technique for the first time)
  • Invest in good materials. Your gifts will only be as good as the materials they're made of. I think part of the reason that some people shy away from making their own gifts is that they're afraid they'll look tacky or "holly hobby." Using the best materials you can afford really helps avoid this - think about it: a simple hand-crocheted scarf in cheap acrylic yarn is one thing, but that same simply scarf worked in a more expensive cashmere yarn is luxe. And if you're going to put all that hard work into it, you want it to be something the recipient will love and really use!
  • Take your time and do it right. This is my downfall... I tend to be a "forest" person (i.e. not very detail-oriented), but I learned that this is kind of in the same vein as "use good materials"... Taking the time to do projects "the right way" is what elevates handmade projects from "holly hobby". If you're refinishing furniture, take the time to properly clean and sand it before trying to paint. Use the appropriate glue. Let the paint dry before moving on to the next step. Etc. (yes, I do have a story for each of these!)
  • If you can, start "stashing." It's easier to create when you have a stash of materials to draw from. My stash was only a Rubbermaid bin, but just having that rubbermaid bin to stick stuff away for later saved me a ton of money. If you're going to be making a lot of sewing projects, start hoarding scraps of material, buttons from rag-bag clothes, etc.
I'm going to do some more posts, including my favorite tutorials, some gifts I created all by myself (lol, tutorials to come), tips, stocking stuffers, etc. So stay tuned! :)

Tuesday, March 29, 2011

Postponed

Just a quick note to say that today's scheduled tutorial will be posted later this week. I have a great project planned - but I started it too late, and it ended up needing an extra coat of paint, which needed extra time to dry (this is why I hate paint, lol!). See you then!

Wednesday, March 23, 2011

Back On Track

I was feeling a bit off-track last week; not sure what was going on, but in all fairness to myself, there was a lot going on - I had a busy week without a lot of downtime, and part of the busyness was the wedding of one of my close guy friends. I've grown up with this guy and his family as my "brothers" and God has used them all to model biblical manhood in my life, since - living with four sisters and a brother who didn't arrive until second-t0-last - male models were lacking somewhat in my life. :) I have been so blessed and humbled in the last few years to watch him start a beautiful relationship and prepare for marriage, and Saturday was the big day. Talk about emotional! I cried and cried. :) He and his fiancee actually asked me to sing during the ceremony, which was such a compliment, and I held it all together until I sat down after singing. Then seeing his beautiful bride and the love that was so apparent in their eyes for each other, plus their vows - which they wrote themselves and that touched on every aspect of their future marriage, from child-rearing to their roles as man and wife - oh, the floodgates opened. They were happy tears. :) I pretty much came home and crashed for the rest of the day.

For those of you who have been - ahem, concerned - (and by concerned, I mean they assume I gave up on it) at the lack of Weight Watchers content on my blog lately... don't be. It's true, I "broke" with the program for a little while because I was dealing with other issues and just felt like I couldn't handle it all at once, but - and apparently this is a big but - I didn't regain an ounce of the lost weight and started back up again a while ago. :)

I think part of the reason I got so stressed and felt like I couldn't handle it all was because I never did get a good grip on the new program, PointsPlus. Which, I'm gonna go ahead and say right up front: do NOT like it as much as the old program. I have been slow in publicly saying this because I felt like until I could use the program successfully - and by successfully I mean being able to stick to it and lose weight while on it - I didn't have the right to bash it.

Well, it's been awhile now doing both successfully, and I still don't like the old program. There are definitely parts I like - I love that fruit is point free, and I love that you get the "encouragement" to eat high-protein foods, which I naturally gravitate towards - but the parts that I hate - the fact that it's nearly impossible to guesstimate in a pinch, the, ahem, "strong discouragement" over carbs (ANY carbs, white, wheat, whole grain, etc) - far outweigh the parts I love. However, learn it I did and stick to it I am. There is a LOT of fruit getting eaten in my life right now, lol, mostly to make room for carbs, which have been severely limited. Tonight's post-yoga-workout dinner, for instance, was reduced-fat PB & sugar-free J on whole wheat bread, with a big glass of nonfat milk. :)

Speaking of yoga - UGH! Spring break (read: two weeks with no practice)+first session back (and a challenging one to boot)=NOT GOOD. :) I was struggling all over the place today, but I laughed at myself and kept going, and I definitely feel good now, several hours later. My "yoga high" in on. :)

had some time today while Abby was in school, so I ducked in to Ross to check out their latest shipment. You know how sometimes you go shopping and absolutely nothing you try on looks good, fits right, etc? Well, the flip also sometimes occurs (albeit much more rarely): sometimes you have days where you lug a ton of clothes into the dressing room and EVERYTHING FITS! and looks great! Is this a real phenomenon or is it just purely a state of mind? I have no idea...


Anyway, I refrained from buying every piece of clothing that fit - believe me, I wanted to! - but I did score a Michael Kors top for $14.99. It doesn't really get any better than this.

I also found these two leather-bound journals - what writer doesn't love a new journal?! The crisp pages, the straight lines waiting to be filled up... and these two are particularly beautiful (and $6 a piece!)


You know how once in awhile when you've been out in the elements, and your lips get chapped, and you take some lip balm and smooth it over them, and it soothes your lips? Well... I have this theory that everybody has some form of "soul balm" and for me it's words by C.S. Lewis. Lately I've been enjoying this collection of essays by him and let me tell you - soul balm. I can't even count how many times I have burst out laughing, or suddenly teared up reading something that completely touched me. Love it. I can't wait to get to heaven and meet him. :)


Since I was in the mood for "lighter" reading material, I picked up the latest copy of ReadyMade mag... I lovelovelove this magazine, and it's impossible to describe. It has a little bit of everything - crafts, architecture, DIY, travel, cooking... Life, I guess. One of these days I'm going to get my own subscription.

Of course, I got home to discover my issue of Ladies Home Journal had finally arrived - and who was their covergirl this month but Mariska Hargitay, my new hero?!?

I get so pumped up by women like her. :) For those of you who don't know, Mariska plays the female lead of Law & Order: Special Victims Unit, a detective who investigates (mainly) sexual assault, rape, etc. However, Mariska has also founded her own organization, Joyful Heart, to help survivors of sexual violence. The article was terrific and really inspiring. Go, girl! :)

Well, the sun seems to have rolled back behind the clouds for now and I needed a pick-me-up, so I gave myself a DIY pedicure and chose a cheerful color. Two, actually - a fun lavender and a clear glitter. :)


I hope everyone is ready for a good weekend - I know I'm excited about the downtime to craft, sew, read, and be generally creative. :)

Tuesday, March 22, 2011

Easy-Peasy Crocheted Flower

Easy-Peasy Flower
(for a pin, barrette, clip, magnet, etc!)


I wasn't going to do a crochet
craft, since not everyone can crochet, but this flower that I designed this week is so quick and easy I'm pretty sure almost anyone can do it! Plus, with the wedding of a close friend this week, and all the prep for that, I haven't had any time to do any other crafting. :( If you don't crochet, why not try it out? I've linked up all the stitches to tutorials from Crochet Today, and taken lots of pictures! :)

Supplies:
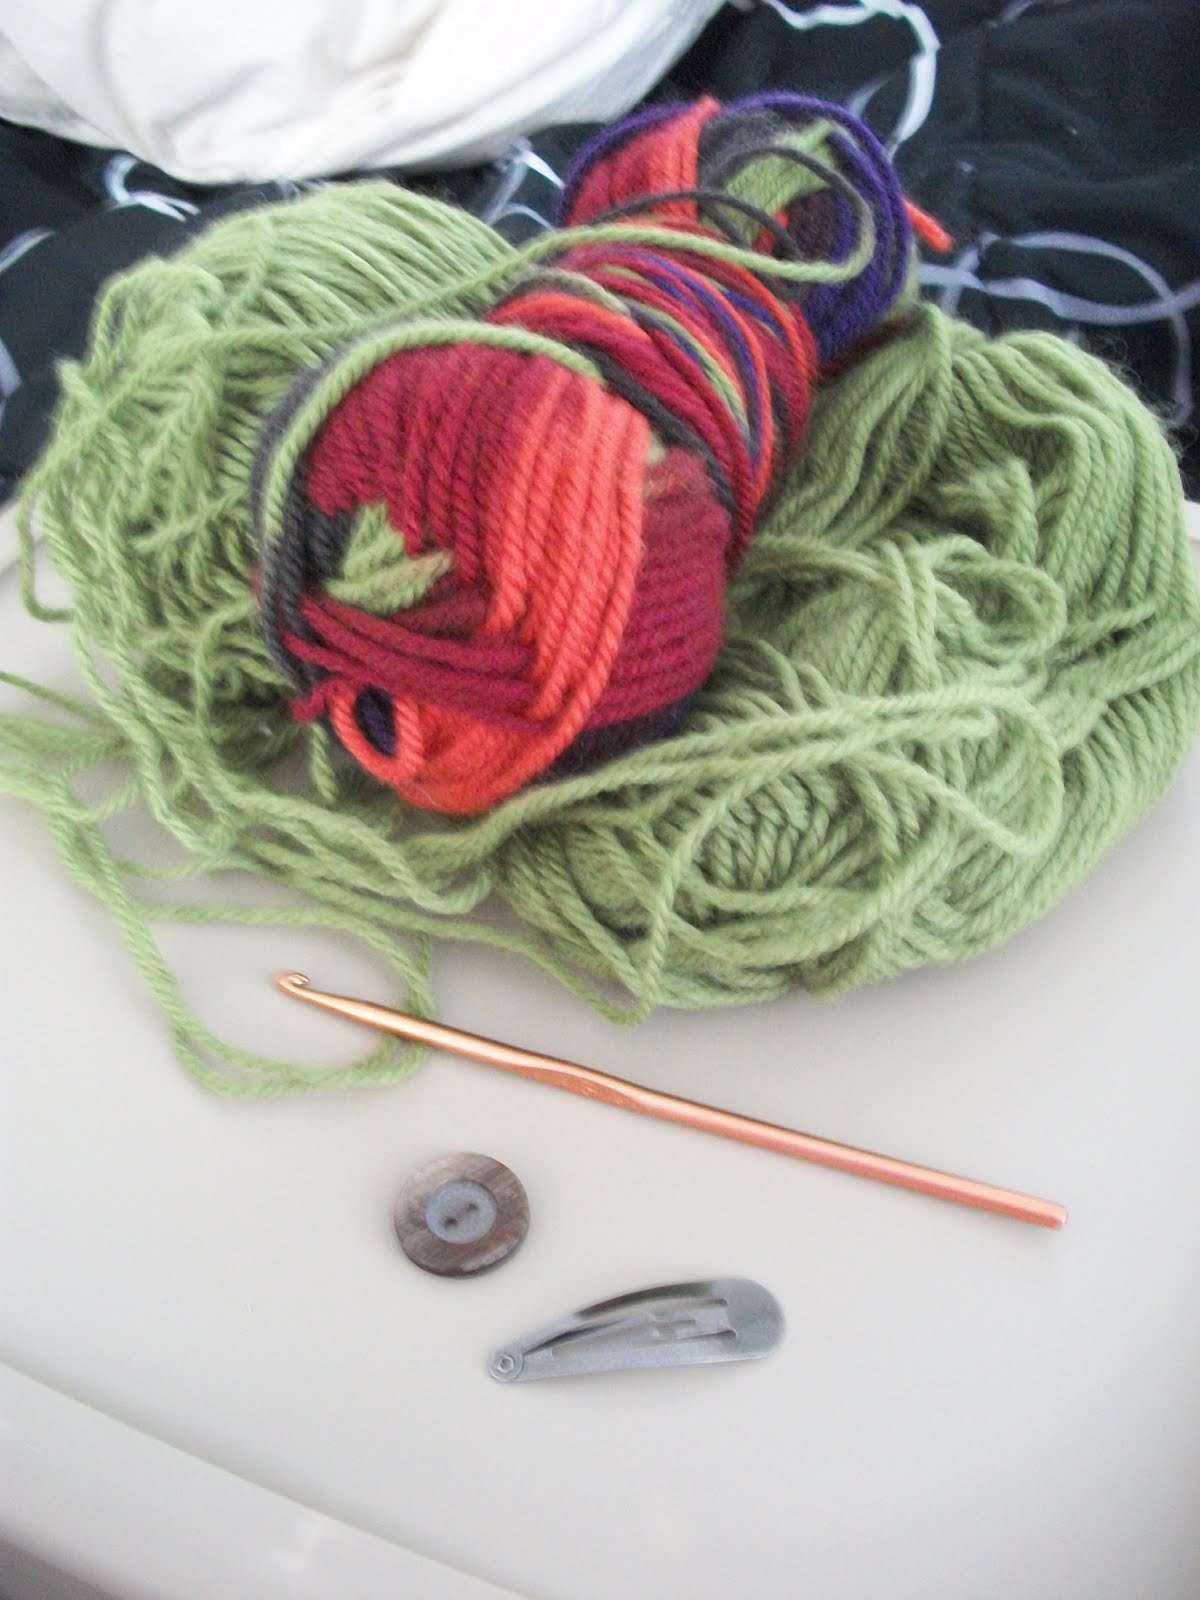
  • Size G crochet hook, or one slightly larger or smaller (you’ll get a larger or smaller flower, but the pattern will still work!)
  • Worsted weight yarn (this pattern doesn’t take much; it’s great for using up odds and ends!)
  • Worsted weight yarn in contrasting color
  • 1 button in a coordinating or contrasting color
  • Large needle & thread (not pictured)
  • 1 barrette, bobby pin, pin back, headband, etc (you can attach this flower to almost anything!)
Directions:

Flower

Chain 4.

Join with slip stitch to form a ring.


This is your flower’s center.

Round 1
Chain 4, [dc in ring, ch 2] 5 times; join with sl st in 2nd chain of beginning ch 4.


Your flower should have six loops around it now; these will become the petals.

Round 2
In each loop around, work the following: sc, hdc, dc, tr, dc, hdc, sc; join with slip stitch in first sc.


Fasten off and weave in ends. Your flower is done!


Leaves

Using your contrasting yarn, chain 10.


Slip slitch in second chain from hook; sc in next stitch, hdc in next stitch, dc in next stitch, tr in next stitch, dc in next stitch, hdc in next stitch, sc in next stitch, slip stitch in last chain.

Fasten off and weave in ends. Repeat (makes two leaves).


Assembly

Position the two leaves on one side of the flower as shown; using needle and thread, attach leaves to flower.


Sew button in the center of the flower.


Using either needle and thread or a hot glue gun, attach the flower to a barrette, headband, bobby pin, pin back, magnet, etc.

You're done!


Enjoy! :)


Tuesday, March 15, 2011

Fabric Squares Matching Game

I promised myself I'd do at least one craft tutorial that involved sewing, so here it is - a fun matching game!

Fabric Squares Matching Game
Supplies:
These are a bit approximate, as a lot depends on how big the squares on your fabric are, how many blocks you want to make, etc; my pictures show two game "boards" with 12 felt squares - the fabric squares were 3".)
1/8-1/2 yard of fabric with a square pattern (or circles, or rectangles, or whatever)
4-6 pieces of felt in coordinating or matching colors
Coordinating or contrasting thread (note: this project takes TONS of thread - I kept having to stop and reload my bobbin!)
Pinking shears would be AMAZING! (I didn't have any on hand but if I'd have had them, I'd definitely have used them!)

Decide how big you want your gameboard to be. Since my squares are kind of big (3"), I decided to use an entire piece of felt for the gameboard; I have some other material with 1" squares, though, and when I use it I'll make each gameboard 1/2 piece of felt big.
Cut out a panel from your material slightly smaller than one sheet of felt.

(Just a sidenote here... aren't those critters cute?! :)).

Center your panel on a piece of felt.

Now, here I'm going to insert a little disclaimer: I'm not really a sewer, so this is just how I did it. I'm sure there are better or easier ways to do this, but this is how I did it. :)
Set your machine on "zigzag" and adjust your stitch so that the WIDTH stays the same, but decrease your LENGTH to 0.5 mm.
Sew all around your panel.
Your edges should look something like this.

If you like, you can also sew in between the squares (I did, just to create more stability).

When you're done, you should have something that looks like this on one side -
- and like this on the other side!


If you want more than one gameboard, repeat these steps until you have the desired number of gameboard.

Okay, now for some pieces to play with!
Cut the remaining felt into squares 1/2" bigger than your fabric squares (for example, my fabric squares were 3", so I made the felt squares 3 1/2").
Cut out an equal number of fabric squares - note, if you have a big pattern, make sure you get at least one matching square for each square on your gameboard, or else the game won't work.

Center your fabric squares on the felt squares.


Sew around the edges; you can do it just like you did the gameboard, for this kind of look:

Or you can switch it up a bit and use a straight stitch. If you do this, and you don't use pinking shears to cut your fabric, the edges will fray a bit. I personally think this adds to the charm. :)

You're done!
Here's how to play the game - several ways, actually!
If your child is younger (12 months - 1 year, or thereabouts) you can lay all the pieces face-up and let them pick them up and match the pictures on the pieces to the pictures on the board.
If your child is a little older (1-2), you can lay all the pieces face-down and take turns picking them up and matching them to the board.
For older children (3+), try playing Bingo with the squares. Throw all the squares into a basket, mix them up, and take turns pulling them out. First person to cover three squares, three in a row, or all the animals, etc, wins.
Have fun! :) The fun thing about this pattern is that you can change up the patterns and the colors and customize it for any child - i.e. dinosaur print, trucks, girly, etc.